This quick-start guide is designed to give a very quick introduction to the most commonly used features of GlobalTrack. These features are all described in greater detail in their sections of this manual and you are encouraged to read about them there.
Note
Launching, tracking and completing a Run require that a Project and Run have been created in GlobalTrack. For the purposes of this quick-start guide we assume that the Run that you wish to launch already exists.
Launching a Tool
To launch a tool, log in to GlobalTrack and open the Project that contains the Run you wish to launch. From there, Open the Run. Once the Run is loaded your screen should look something like the image below with your pipeline route visible.
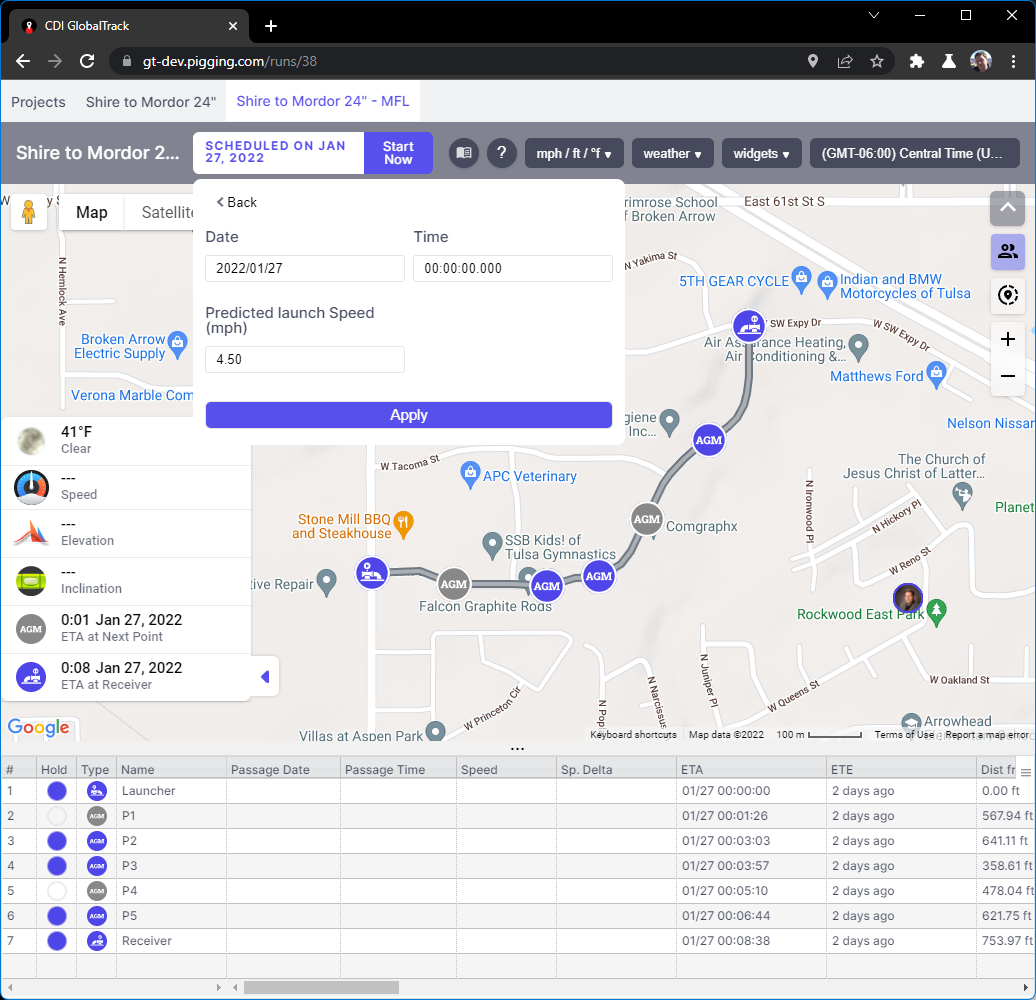
click to enlarge
Click on the white area in the Tool Ribbon which contains the launch date of the run. Alter the Run’s launch date, time and estimated speed.
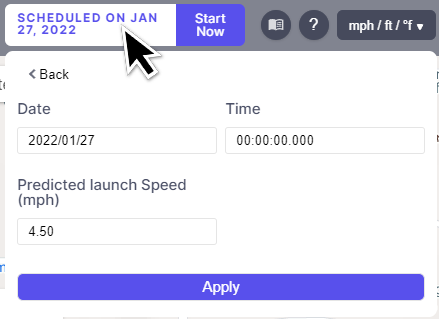
click to enlarge
Note
While the predicted launch speed isn’t critical, it will be used for the tool’s speed from the time of launch until the first tracked AGM point.
To launch your tool, click on the blue button in the Tool Ribbon that reads start now.

Tracking a Tool
Manual Tracking
To track a pipeline pig manually, GlobalTrack can be used as you would a standard spreadsheet-based tracking sheet. Simply enter a time into the Passage Time field on the tracking sheet row corresponding to the location of your tracking point or AGM on the map.
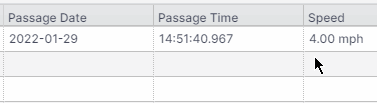
Entering a time in GlobalTrack
Notice that you don’t need to maintain a specific time formatting. Simply enter the digits corresponding to the Hours, Minutes and Seconds of the pig’s passage and either press enter or click onto another cell in the tracking sheet.
The date is entered automatically by GlobalTrack, although you can change it manually if necessary.
As with a spreadsheet-based tracking sheet, GlobalTrack calculates the speed of the tool given the input time and also calculates the ETA (Estimated Time of Arrival) to all of the remaining tracking points in the sheet. In additiion to the ETA, GlobalTrack calculates the ETE (Estimated Time En route) to the next locations as well.
The ETE tells you the amount of time remaining before the tool arrives at these locations if the current speed remains the same.
Automatic Tracking
Automatic tracking takes place when a cellular or satellite instrument sends its time and date to the back-end of GlobalTrack and performs the input without human intervention.
CDI GlobalTrack is able to perform automatic tracking with a number of AGM and general purpose tracking system available from CDI. In fact, the use of GlobalTrack can be free with the purchase or rental of such equipment.
Please Contact CDI for more information.
Receiving a Tool
Receiving a tool and ending the run is largely automatic. The act of entering a passage time for the final tracking point on the tracking sheet is considered receiving the tool. The Run is automatically flagged as Finished.
Aborting a Run
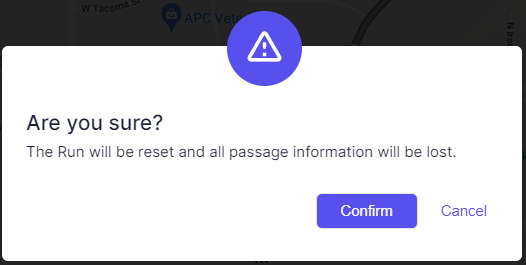
If you’re testing a run or perhaps execute a false-start on a real run, it’s possible to Abort the run compltely without saving any data. This resets the run and deletes any passage times that have been entered.
When you select Abort on the Run menu, you will presneted with a confirmation dialog.
Finish a Run Early
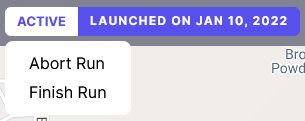
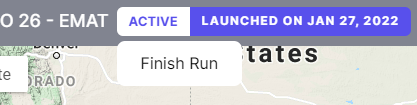
If you wish to finish a Run early, for instance in the case of a stuck pig where you know that the run will not complete normally, this is possible by clicking on the word “Active” next to the launch date. A dropdown will appear with a Finish option as seen below.
Selecting Finish will present you with a confirmation dialog:
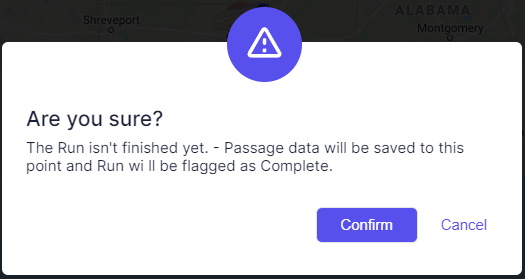
Select confirm.
Finishing a Run early differs from Aborting a Run in that Finishing a Run retains the tracking data that has been entered to that point.
Creating a Report
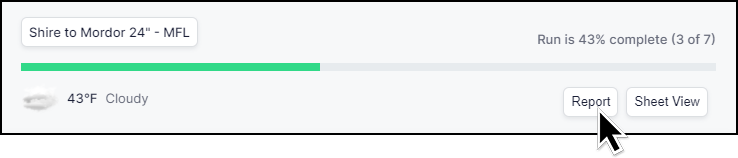
Creating a report in GlobalTrack is simple. From the Project page locate the Run for which you want a Report. On the right-hand side of the card displaying the Run overview is a button labled Report.
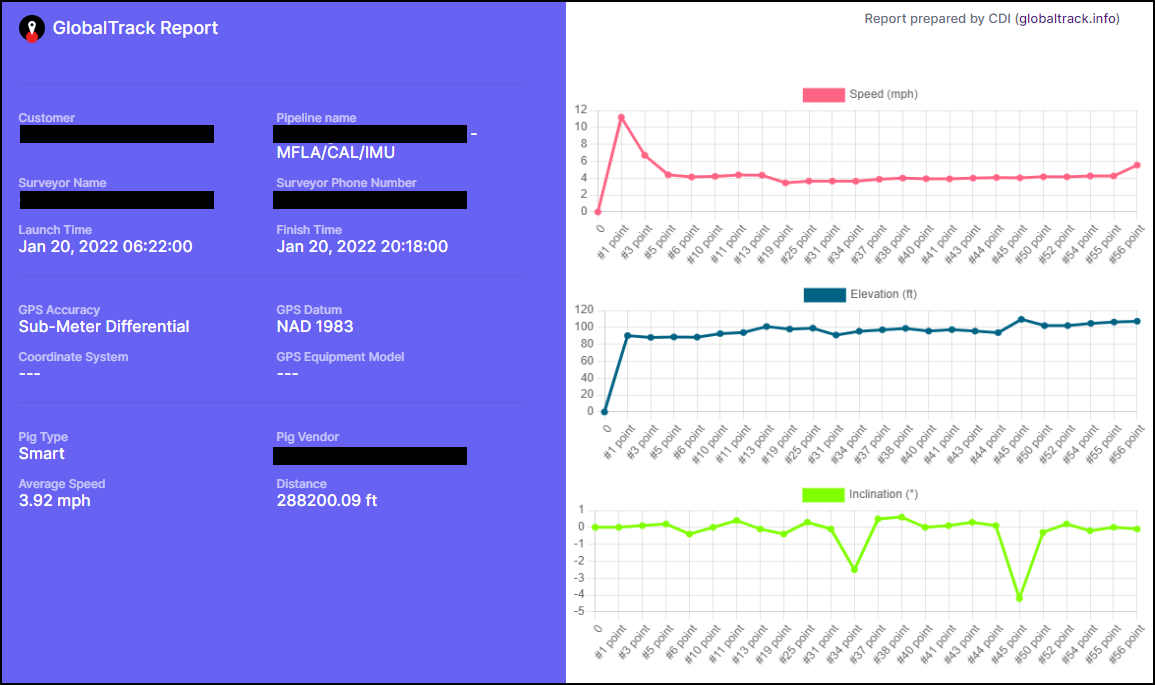
Clicking the Report button will open a new window. After a brief pause while the report it generated it will be displayed:
The report may be printed, and/or saved as a PDF by clicking the button labeled Generate Report at the top of the Report.

This button opens a traditional operating system print dialog from which you can select your print and PDF output options.